Events can cover both council meetings and community events, but they are added in the same way.
First step is to login to your Council website admin area, if you need guidance please take a look at the how to login lesson.
Once you have signed in, click on the Events item in the left hand admin menu.
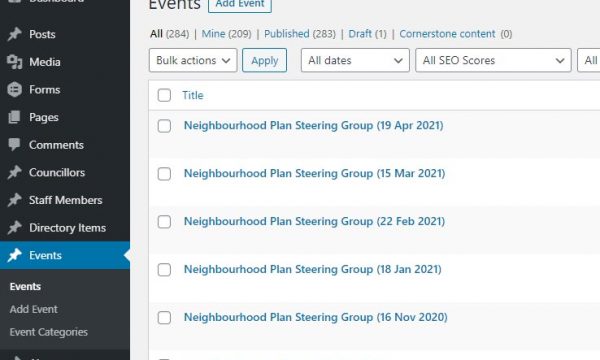
Then go ahead and click the “Add Event” button, you will be taken to the Add New Event page.
The cursor will default to the Add Title position, so that is the first thing to enter.
If the event is a meeting, please keep to the format in place for the title, this is as follows:
‘Committee name’ Meeting (dd mmm yyyy), for example Full Council Meeting (20 Apr 2021)
You can then add any information about the event/meeting below. Simply start typing and the editor will put your text into a paragraph block.
Adding Resources
If you are entering a meeting, or even a social event, you may well have documents to add.
In the case of a meeting this would likely be the Agenda plus any supporting material for the meeting, with the minutes added post meeting.
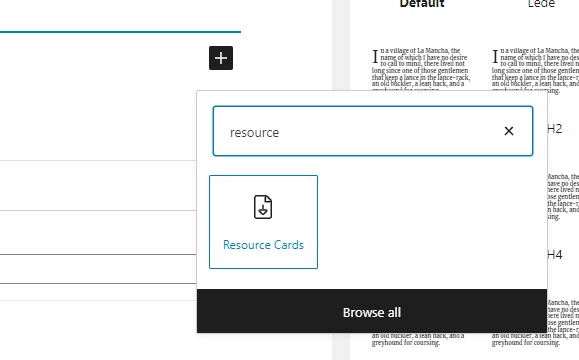
To add resources, click on the Gutenberg Add New block + symbol, search for Resource Cards, and then click to add the block.
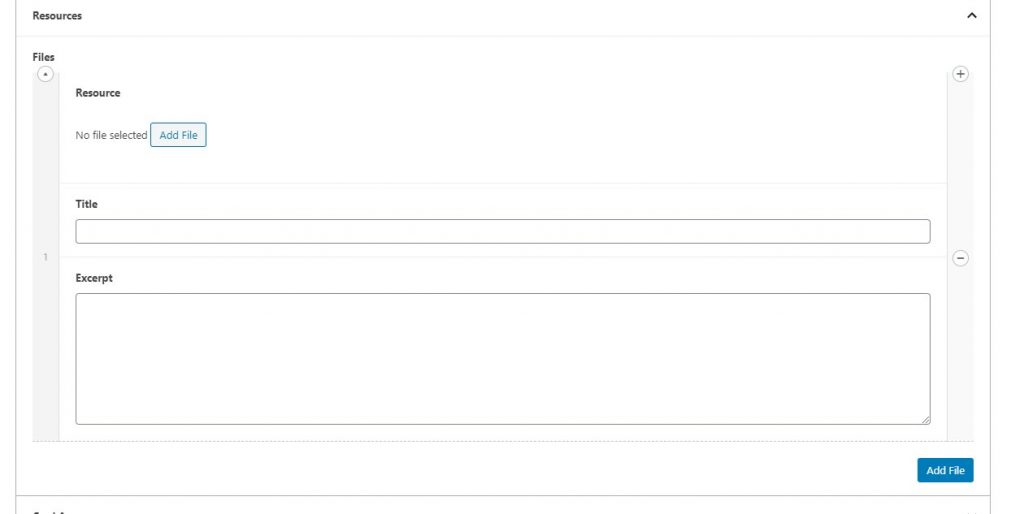
The block will load in to the page for you, and you can then click on the Pencil icon above the block to open it ready to add files.

With the Resource cards open, click on the Resources tab, and then click the blue “Add File” button. This will add a file entry box.
Click the grey Add File button to select the resource file you wish to add.
The Media Library window will open. If the resource has already been added to the Media Library you can simply click on it and then click the blue Select button in the lower right of the window.
If you need to upload the file simply select the Upload files tab at the top left of the window, and then drag and drop the file, or use the standard file selection method by clicking the grey Select File button. Once the file has been uploaded, click the blue Select button on the lower right of the window.
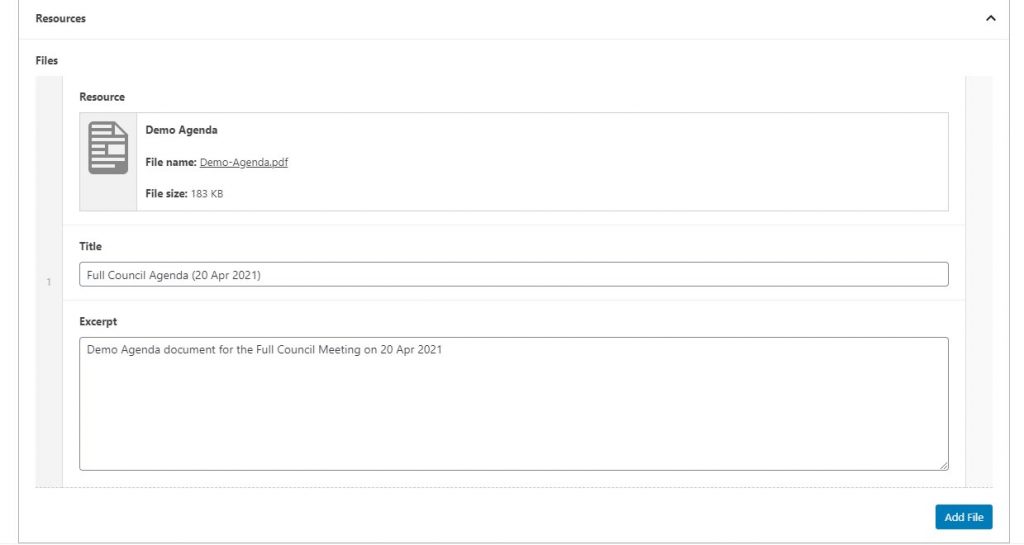
The file is added to the Resource cards for you, and you can now add the Title and Excerpt.
For the document title, if an Agenda or Minutes, we recommend staying with the same format, that being:
Committee name Document Type (dd mmm, yyyy), for example Full Council Agenda (20 Apr 2021)
Should you need to add another document, just click the blue Add File button on the bottom right of the Resource Card box and repeat the steps above.
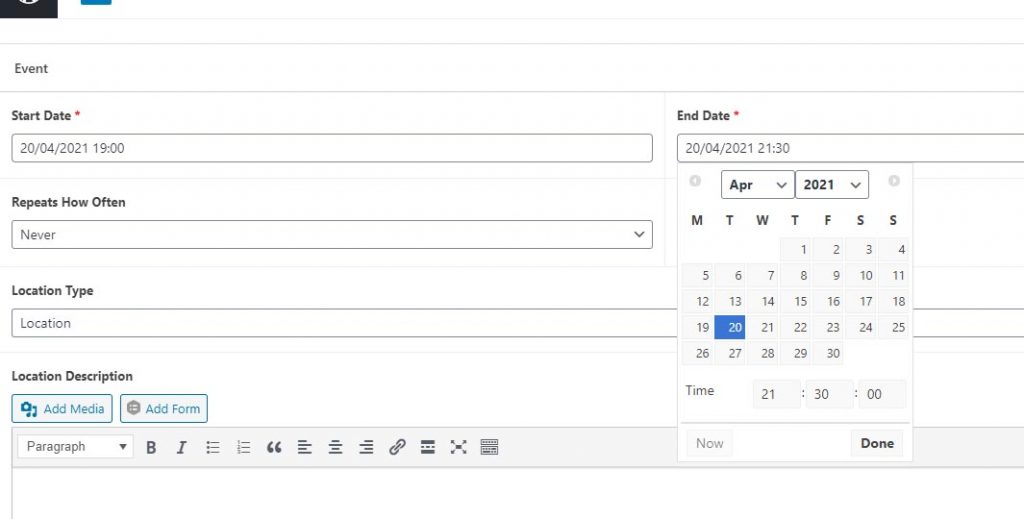
Add Date and Time Information
Scroll down the page a little and enter the Start and End dates and times for your event/meeting. These use date pickers.
You can also select to make the event recurring if it is daily, weekly or monthly.
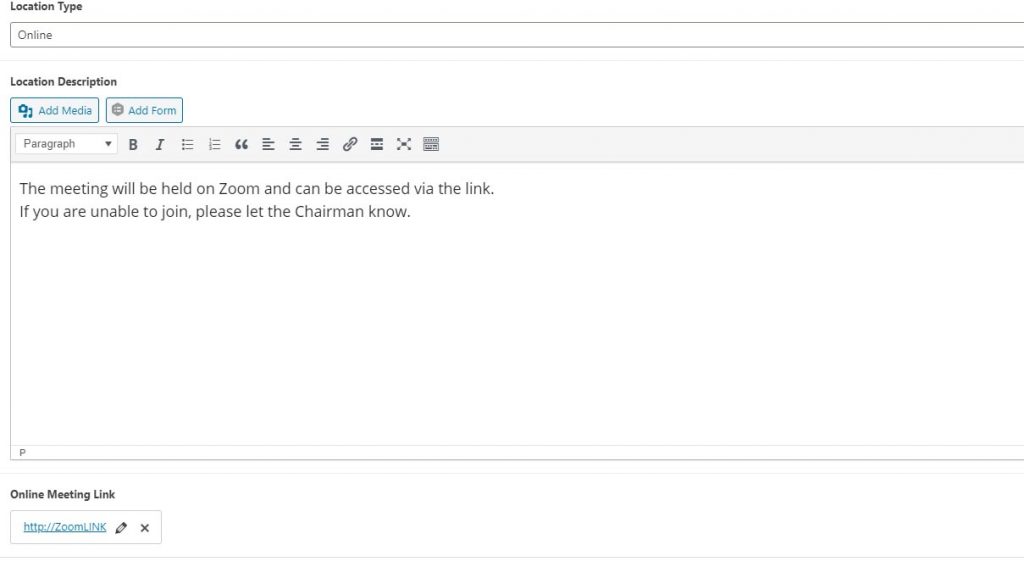
Add the Location Details
Next, add the location information for the event/meeting.
The drop down will allow you to specify if the event has a physical “Location”, is “Online”, or currently “none”.
If you select Online, you can then add the information about the format of the meeting in the Location Description box, and beneath that you can click “Select Link” to add the link to your Zoom, Teams or other online meeting.
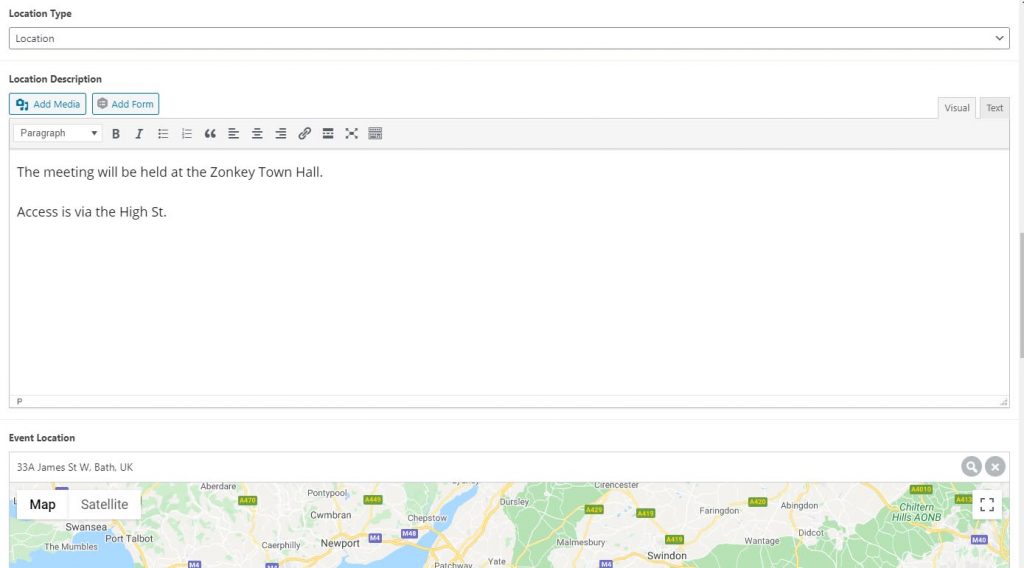
If your event or meeting has a physical location, set the Location Type to Location, add in a Location Description in the box below, and then enter the address in the Event Location map field. This will add a map to your event listing. You can set the initial zoom level of the map by use of the “+” and “-” buttons on the map.
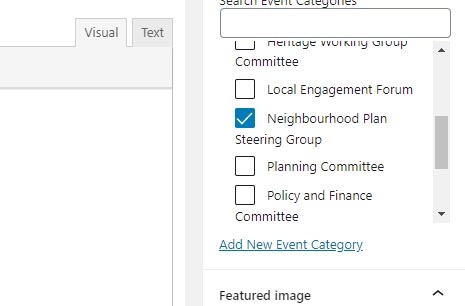
Add the Event Category
With all of the event information entered, and the resources added, it is time to add the event to the correct category.
Frist make sure the Document tab is selected in the top right of the screen.

With the Document tab highlighted, scroll down to the Event Categories section, click the down arrow to expand the section, and then tick the categories appropriate to the event.
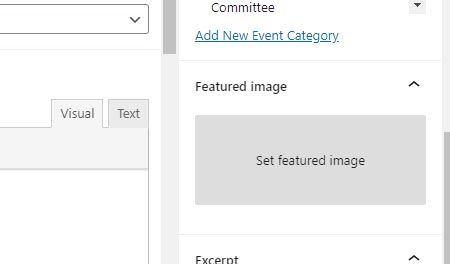
Add your Featured Image
You can now add you featured image for the event. This image will appear above the title of the event when the user views the event card within a page.
Scroll down beneath the Event Categories section to the Featured Image section and click the drop down arrow to expand it.
Click on the Set Featured Image box.
The media library will open up. Select the image you wish to use. You can also upload a new image if needed. Once selected, click the blue “Set Featured Image” button to the bottom left of the Media library pop up window.
Your featured image will now appear in the box.
Add your Excerpt
You have the option to add an excerpt for the event. To do this scroll down beneath the Feature Image section and click on the Excerpt section to expand it.
Add your excerpt text in the box.

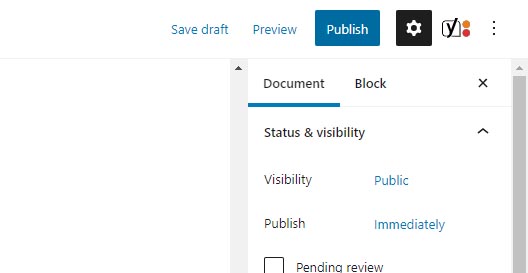
Publish your Event
With everything entered, it is time to publish your event and set it live.
Scroll to the top of the screen and click on the blue Publish button.
The pre publish checks will be shown, and to complete the process simply click on the blue Publish button once more.
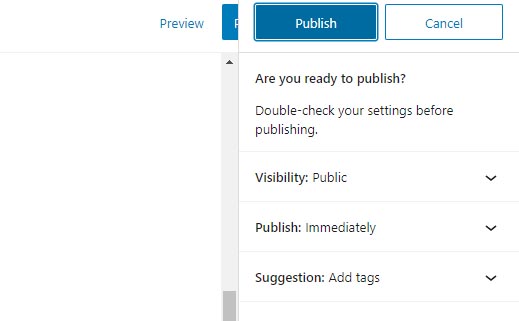
Your event has been added and is live in the website.